iOS App Installation Guide
This comprehensive guide covers everything you need to deploy your PaySuite Flutter application to iOS devices and the Apple App Store. From initial setup to final submission, we've got you covered.
This guide provides comprehensive instructions for setting up, configuring, building, and distributing the PaySuite iOS application. Follow these steps to successfully deploy the Flutter-based application to iOS devices and the App Store.
Quick Navigation
System Requirements
iOS development requires a Mac computer. You cannot build iOS apps on Windows or Linux.
Hardware Requirements
| Mac Computer | Apple Silicon (M1/M2/M3) or Intel-based Mac |
| Operating System | macOS 12.0 (Monterey) or later Required |
| Storage | Minimum 10 GB free disk space |
| RAM | 8 GB minimum (16 GB recommended) |
Software Requirements
| Flutter | Version 3.38.6 or later |
| Dart | Version 3.10.7 or later |
| Xcode | Version 15.0 or later Required |
| CocoaPods | Version 1.15.0 or later |
| iOS SDK | iOS 14.0 or later |
Apple Developer Account
- Apple ID: Required for Xcode and App Store distribution
- Developer Program: Annual subscription ($99/year) for app distribution
- Provisioning Profiles: For code signing and device testing
- Certificates: Development and distribution certificates
You can test apps on physical devices for free with a regular Apple ID. The $99/year Developer Program is only needed for App Store distribution.
MacOS Development Setup
1Install Homebrew (Package Manager)
Homebrew is the package manager for macOS. Open Terminal and run:
/bin/bash -c "$(curl -fsSL https://raw.githubusercontent.com/Homebrew/install/HEAD/install.sh)"After installation, verify it's working:
brew --version
# Should display Homebrew version2Install Flutter on macOS
Download and install the Flutter SDK:
# Download Flutter SDK
cd ~/development
git clone https://github.com/flutter/flutter.git -b stable

# Add Flutter to your PATH
echo 'export PATH="$PATH:$HOME/development/flutter/bin"' >> ~/.zshrc
source ~/.zshrc

# Verify installation
flutter doctorRunning flutter doctor should show the Flutter installation with checkmarks for completed items.
Video Tutorial
3Install CocoaPods
CocoaPods manages iOS dependencies for Flutter projects:
sudo gem install cocoapods
pod setupIf you encounter permission errors, try:
sudo gem install cocoapods -n /usr/local/binFor Apple Silicon Macs (M1/M2/M3), you might need:
sudo arch -x86_64 gem install ffi
sudo gem install cocoapods
Xcode Installation & Setup
1Install Xcode
Xcode is Apple's integrated development environment (IDE) for iOS development.
Installation Options:
- Mac App Store: Search for "Xcode" and click "Get" (Recommended)
- Apple Developer: Download from developer.apple.com
Xcode is over 12 GB. Ensure you have a stable internet connection and sufficient storage space.
Video Tutorial
2Install Xcode Command Line Tools
Install essential command-line tools for development:
xcode-select --installVerify the installation:
xcode-select -p
# Should return: /Applications/Xcode.app/Contents/Developer3Accept Xcode License Agreement
You must accept the license before using Xcode:
sudo xcodebuild -license acceptYou'll be prompted to enter your macOS password. Type it (it won't be visible) and press Enter.
4Configure Xcode & Install Simulators
- Launch Xcode from Applications
- Go to Xcode → Settings → Platforms
- Install the latest iOS simulator
- Install additional required components when prompted
- iPhone 15 Pro (latest flagship)
- iPhone SE (smaller screen testing)
- iPad Pro 12.9-inch (tablet testing)
Get Started with PaySuite iOS
1Download and Extract the Project
Download the PaySuite Flutter project and extract it to your development directory:
cd ~/development
unzip paysuite-ios.zip
cd paysuite-ios2Open Project in IDE
Choose your preferred development environment:
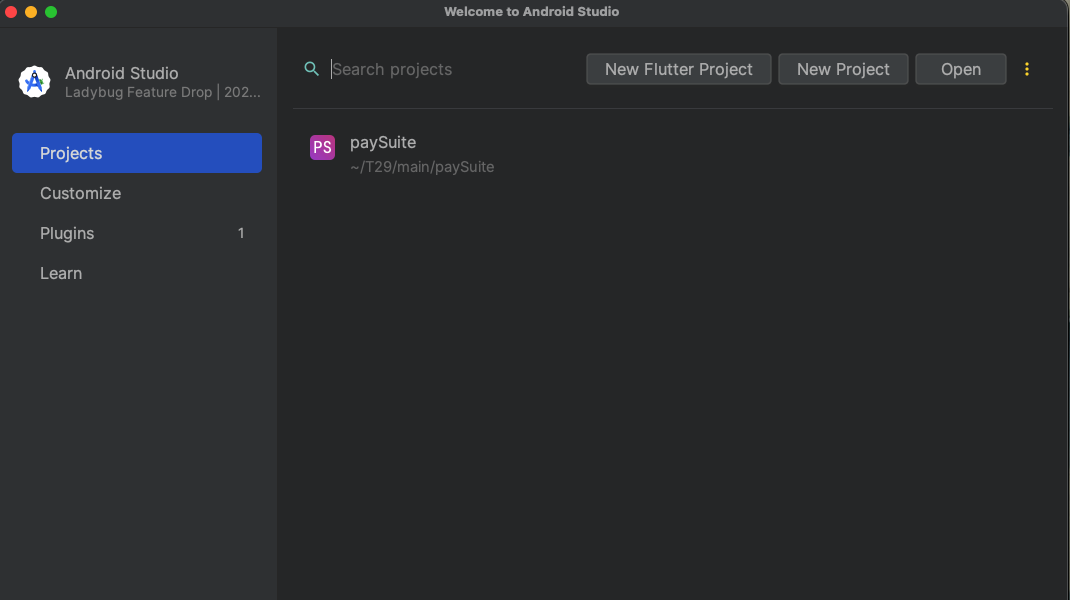
Android Studio:
- Open Android Studio
- File → Open
- Select the project folder
- Wait for indexing to complete
Visual Studio Code:
- Open VS Code
- File → Open Folder
- Select the project folder
- Install Flutter extension if not already installed
Xcode (iOS Only):
- Navigate to
iosfolder - Open
Runner.xcworkspace(not .xcodeproj) - Wait for project to load
3Configure API Endpoints
Connect your mobile app to your REST API by updating the base URL:
utils/app_constants.dart
class AppConstants {
  static const String baseUrl = "https://your-api-domain.com/api/";
  // Update with your actual API endpoint
}
Ensure your API URL ends with a forward slash (/) and uses HTTPS for production environments.
iOS-Specific Configuration
1Configure iOS Deployment Target
Set the minimum iOS version your app supports:
ios/Podfile
platform :ios, '14.0'
# Minimum iOS version supported- iOS 14+: ~95% of devices (Recommended minimum)
- iOS 15+: ~85% of devices
- iOS 16+: ~70% of devices
Setting iOS 14 as minimum ensures maximum device compatibility.
2Update Info.plist with Permissions
Configure required permissions for your app features:
ios/Runner/Info.plist
<key>NSPhotoLibraryUsageDescription</key>
<string>Need photo library access to upload images</string>

<key>NSCameraUsageDescription</key>
<string>Need camera access to take photos</string>

<key>NSMicrophoneUsageDescription</key>
<string>Need microphone access for audio features</string>

<key>UIViewControllerBasedStatusBarAppearance</key>
<false/>| Photo Library | Access user's photos for uploads/profile pictures |
| Camera | Take photos directly within the app |
| Microphone | Record audio for voice features |
| Location | Access GPS for location-based features |
| Notifications | Send push notifications to users |
3Configure App Capabilities
Enable required capabilities in Xcode:
- Open
ios/Runner.xcworkspacein Xcode - Select the Runner project
- Select the Runner target
- Click Signing & Capabilities tab
- Click + Capability to add:
- Background Modes (for background tasks)
- Push Notifications (for push messages)
- In-App Purchase (if selling products/subscriptions)
- Associated Domains (for universal links)
iOS App Icons Configuration
iOS requires multiple icon sizes to support different devices and contexts. You'll need to generate a complete icon set.
1Prepare App Icons
Generate all required icon sizes using one of these methods:
Online Tools (Recommended):
- AppIcon.co - Free, comprehensive icon generator
- Canva - Design and generate icons
- MakeAppIcon - Quick icon generation
Design Guidelines:
- Base Size: Start with 512×512 px image
- Format: PNG with no transparency
- Color Space: sRGB or Display P3
- Shape: Square (iOS applies rounded corners automatically)
- Content: Avoid text (use simple, recognizable imagery)
2Required Icon Sizes
iOS requires these specific icon sizes:
| Device/Context | Size (pixels) | Scale | Points |
|---|---|---|---|
| iPhone | 180×180 | 3x | 60×60 points |
| iPhone | 120×120 | 2x | 60×60 points |
| iPad Pro | 167×167 | 2x | 83.5×83.5 points |
| iPad | 152×152 | 2x | 76×76 points |
| App Store | 512×512 | 1x | 512×512 points |
| Settings | 87×87 | 3x | 29×29 points |
| Settings | 58×58 | 2x | 29×29 points |
| Notifications | 60×60 | 3x | 20×20 points |
| Notifications | 40×40 | 2x | 20×20 points |
3Replace App Icons in Xcode
Add your generated icons to the project:
- Navigate to
ios/Runner/Assets.xcassets/AppIcon.appiconset - Open this folder in Finder
- Replace all icon files with your generated icons
- Or use Xcode: Open
Runner.xcworkspace→ Assets.xcassets → AppIcon → Drag & drop icons
In Xcode, all icon slots in AppIcon should be filled with no warnings. Missing icons will cause App Store submission to fail.
Bundle Identifier & Code Signing
The Bundle Identifier uniquely identifies your app in the App Store. Once published, it cannot be changed. Choose carefully!
1Change Bundle Identifier
Update your app's unique identifier in Xcode:
- Open
ios/Runner.xcworkspacein Xcode - Select Runner in the Project Navigator
- Select the Runner target (not the project)
- Go to the General tab
- Update Bundle Identifier field
com.yourcompany.paysuite
Use reverse domain notation (e.g., com.company.appname)
- Format: Reverse domain notation
- Characters: Letters, numbers, hyphens, and periods only
- Example: com.paysuite.mobile
- Uniqueness: Must be globally unique across all iOS apps
- Consistency: Should match your website domain when possible
2Configure Code Signing
Set up code signing to run on devices and distribute to the App Store:
Automatic Signing (Recommended for Beginners):
- In Xcode, go to Signing & Capabilities tab
- Check "Automatically manage signing"
- Select your Team from dropdown
- Xcode will automatically generate provisioning profiles
If you don't see your team, sign in with your Apple ID in Xcode → Settings → Accounts.
For more control, use manual signing:
- Uncheck "Automatically manage signing"
- Create certificates in Apple Developer Portal
- Create provisioning profiles for development and distribution
- Download and install profiles in Xcode
- Select appropriate profiles in Xcode
3Update Display Name
Change the name that appears under your app icon:
ios/Runner/Info.plist
<key>CFBundleDisplayName</key>
<string>PaySuite</string>
Character Limit: Keep it under 12 characters for best display on all devices.
Install iOS Dependencies
1Install Flutter Dependencies
Clean and fetch all Flutter packages:
2Install CocoaPods Dependencies
Navigate to the iOS directory and install native dependencies:
cd ios
pod deintegrate
pod cache clean --all
pod installThe first pod install can take 5-10 minutes depending on your internet speed and number of dependencies.
If you encounter errors during pod install:
# Update CocoaPods
sudo gem install cocoapods

# Clear all caches
rm -rf ~/Library/Caches/CocoaPods
rm -rf Pods
rm -rf ~/Library/Developer/Xcode/DerivedData/*
rm Podfile.lock

# Try again
pod install --repo-update3Verify Installation
Check that everything is properly configured:
Look for checkmarks (✓) next to:
- Flutter (Channel stable)
- Xcode - develop for iOS and macOS
- VS Code or Android Studio (your IDE)
- Connected device
Run iOS Application
1List Available Devices
See all available iOS simulators and connected devices:
Open an iOS simulator:
2Run on iOS Simulator
Launch your app on the simulator:
Or specify a specific simulator:
| Rotate Device | Cmd + Left/Right Arrow |
| Home Button | Cmd + Shift + H |
| Lock Screen | Cmd + L |
| Screenshot | Cmd + S |
| Toggle Appearance | Cmd + Shift + A |
3Run on Physical iPhone/iPad
Test on a real device for accurate performance testing:
- Connect Device: Plug iPhone/iPad via USB cable
- Trust Computer: Unlock device and tap "Trust" when prompted
- Keep Awake: Keep the device unlocked during installation
- Select in Xcode: Choose your device from the device list
- Run: Execute
flutter run -d "Your iPhone Name"
After installing on a physical device for the first time, go to Settings → General → VPN & Device Management → Trust Developer on your iPhone/iPad.
4Development Features
Use these keyboard shortcuts while running your app:
| Hot Reload | Press r in terminal - Updates UI without losing state |
| Hot Restart | Press R in terminal - Full app restart |
| Open DevTools | Press v in terminal - Opens debugging tools |
| Stop App | Press q in terminal - Quit the application |
Build & Archive for Distribution
1Build Release Version
Create a release build of your iOS app:
The first release build can take 10-15 minutes. Subsequent builds are much faster.
2Open Project in Xcode
Open the workspace file (not the project file):
Always open .xcworkspace, not .xcodeproj. The workspace file includes CocoaPods dependencies.
3Configure Archive Settings
Prepare your project for archiving:
- In Xcode, select Runner project in navigator
- Select Runner target
- Go to Build Settings tab
- Search for "iOS Deployment Target"
- Ensure it matches your minimum version (e.g., 14.0)
- Bitcode: Set to "Yes" (required for App Store)
- Strip Debug Symbols: Set to "Yes" for release
- Dead Code Stripping: Set to "Yes" to reduce app size
- Optimization Level: Set to "Fastest, Smallest"
4Create Archive
Archive your app for distribution:
- In Xcode, select Any iOS Device (arm64) or Generic iOS Device as build target
- Go to menu: Product → Archive
- Wait for the archive process to complete (5-10 minutes)
- The Organizer window will open automatically when done
Your archive will appear in the Organizer with today's date and time. You can create multiple archives.
5Validate Archive
Check for issues before uploading to App Store:
- In Organizer window, select your latest archive
- Click "Validate App" button
- Select your distribution certificate and provisioning profile
- Click "Validate" and wait for results
- Fix any errors or warnings before proceeding
- Missing Icons: Ensure all icon sizes are provided
- Invalid Bundle ID: Check Bundle Identifier format
- Missing Permissions: Add required Info.plist descriptions
- Code Signing Issues: Verify certificates and profiles
App Store Connect & Distribution
Ensure you have an active Apple Developer Program membership ($99/year) to submit apps to the App Store.
1Prepare App Store Assets
Gather all required materials before creating your app listing:
- Show your app's key features and benefits
- Use clean, simple screenshots without clutter
- Highlight unique selling points
- Consider adding text overlays to explain features
- Use the simulator to capture screenshots at exact sizes
2Create App Record in App Store Connect
Register your app in the App Store:
- Visit App Store Connect
- Sign in with your Apple Developer account
- Click "My Apps"
- Click the "+" button → "New App"
- Fill in the app information:
| Platform | iOS |
| Name | PaySuite (must be unique, check availability) |
| Primary Language | English (or your primary language) |
| Bundle ID | Select your bundle ID from dropdown |
| SKU | Unique identifier (e.g., paysuite-ios-2024) |
| User Access | Full Access (recommended) |
Your app name must be unique across the entire App Store. If taken, you'll need to choose a different name.
3Upload Build to App Store Connect
Submit your validated archive:
- In Xcode Organizer, select your validated archive
- Click "Distribute App"
- Select "App Store Connect"
- Choose "Upload"
- Select your distribution certificate and provisioning profile
- Review the app information
- Click "Upload"
- Wait for upload to complete (can take 10-30 minutes)
You'll receive an email from Apple when your build is processed and ready (usually within 15-30 minutes).
4Complete App Information
Fill in all required sections in App Store Connect:
App Information:
- Category (Primary & Secondary)
- Content Rights
- Age Rating (complete questionnaire)
Pricing and Availability:
- Price (Free or Paid)
- Availability date
- Territories (where app is available)
App Privacy:
- Privacy Policy URL
- Data collection and usage details
- Third-party data sharing information
App Store Listing:
- Name and subtitle
- Description and promotional text
- Keywords
- Screenshots for all device sizes
- App preview videos (optional)
- Support URL and marketing URL
5Submit for Review
Final steps before submission:
- Navigate to your app in App Store Connect
- Go to the "App Store" tab
- Click "+ Version or Platform" → "iOS"
- Select your uploaded build
- Complete all required fields marked with red asterisks
- Review all information for accuracy
- Click "Submit for Review"
App review typically takes 24-48 hours. You'll receive emails about status changes. Check status in App Store Connect.
6TestFlight Beta Testing (Optional)
Test your app with users before public release:
- In App Store Connect, go to "TestFlight" tab
- Select your build
- Internal Testing: Add up to 100 team members
- External Testing: Add up to 10,000 external testers
- Submit for Beta App Review (required for external testing)
- Share public link or invite testers via email
- Collect feedback and iterate
- Test with real users before public launch
- Gather crash reports and analytics
- Collect user feedback
- Verify app works on various devices
- Test in-app purchases in sandbox environment
Common Issues & Troubleshooting
CocoaPods Installation Issues
If pod install fails:
# Reinstall CocoaPods with correct path
sudo gem install cocoapods -n /usr/local/bin

# Update pod repository
pod repo update

# Clean and reinstall
rm -rf Pods Podfile.lock
pod install

# For Apple Silicon Macs
sudo arch -x86_64 gem install ffi
sudo gem install cocoapods
Code Signing Errors
Resolve common signing issues:
# Clean derived data
rm -rf ~/Library/Developer/Xcode/DerivedData

# Reset provisioning profiles
rm -rf ~/Library/MobileDevice/Provisioning\ Profiles

# In Xcode: Product → Clean Build Folder
# Keyboard shortcut: Shift + Cmd + K

# Re-download provisioning profiles
# Xcode → Settings → Accounts → Download Manual Profiles- Open Xcode → Settings → Accounts
- Select your Apple ID
- Click "Download Manual Profiles"
- Go to project Signing & Capabilities
- Uncheck "Automatically manage signing"
- Manually select correct profiles
- Re-enable "Automatically manage signing"
Flutter iOS Build Issues
Fix build problems:
# Complete clean
flutter clean
rm -rf ios/Pods ios/Podfile.lock ios/.symlinks
rm -rf ~/Library/Developer/Xcode/DerivedData/*

# Reinstall dependencies
cd ios
pod deintegrate
pod install
cd ..

# Update Flutter
flutter upgrade
flutter doctor -v

# Rebuild
flutter build ios --release
Simulator Issues
Reset and manage simulators:
# Shutdown all simulators
xcrun simctl shutdown all

# Erase all simulator data
xcrun simctl erase all

# List available simulators
xcrun simctl list devices

# Boot specific simulator
xcrun simctl boot "iPhone 15 Pro"

# Delete unavailable simulators
xcrun simctl delete unavailable
Memory and Performance Issues
Optimize Xcode performance:
# Increase Xcode memory for compilation
defaults write com.apple.dt.Xcode IDEBuildOperationMaxNumberOfConcurrentCompileTasks `sysctl -n hw.ncpu`

# Clear Xcode caches
rm -rf ~/Library/Caches/com.apple.dt.Xcode
rm -rf ~/Library/Developer/Xcode/DerivedData

# Restart Xcode and Mac if issues persist
Useful Debugging Commands
Helpful commands for troubleshooting:
# Detailed Flutter doctor output
flutter doctor -v

# List all connected devices
flutter devices

# Build and analyze app size
flutter build ios --analyze-size

# Build IPA directly
flutter build ipa

# Check iOS deployment
flutter run -v

# Clean everything
flutter clean && cd ios && pod deintegrate && pod install && cd ..
App Store Rejection Issues
- Missing Privacy Policy: Add valid privacy policy URL
- Incomplete Metadata: Fill all required App Store fields
- Crashes: Test thoroughly before submission
- Misleading Screenshots: Show actual app functionality
- Missing Features: App must work as described
- Inappropriate Content: Follow App Store guidelines
Resources: Review App Store Review Guidelines
You've completed the iOS installation and deployment guide for PaySuite. Your app is now ready for the App Store!
- Continue testing on various iOS devices and versions
- Monitor crash reports and analytics in App Store Connect
- Respond to user reviews and feedback
- Plan regular updates with new features and bug fixes
- Check out the User Guide for app features documentation